

A Recovery Disk or a Recovery Partition will allow you to restore your computer to the original settings from the manufacturer, but you will not be able to use it to repair your Windows installation. For that, you will need an actual Windows CD/DVD that contains the Windows Recovery Environment; without the tools contained in the Windows Recovery Environment, you cannot repair your current installation.NeoSmart's recovery discs, however, can set things right.
NeoSmart Technologies is hosting a copy of the Windows 7 Recovery Disc for your convenience. It's a 143 MB download (165 MB for the 64-bit version), and in the standard ISO format, ready to burned directly to a CD or DVD. Don't wait until your PC crashes to download a copy! Download and burn your recovery disc today, so that when the time comes, you'll be ready.

The Windows 7 Recovery Disc can be used to access a system recovery menu, giving you options of using System Restore, Complete PC Backup, automated system repair, and a command-line prompt for manual advanced recovery.Remember it only fixes (not replaces!) Windows.
Download :Windows 7 Recovery Disc 32-Bit (x86) Edition | Windows 7 Recovery Disc 64-Bit (x64) Edition |Windows Vista Recovery Disc
Instructions
- Download the appropriate torrent file with µTorrent or any other torrent downloading tool.
- Burn the .iso file that µTorrent downloaded to a CD using these instructions.
- When you want to use the recovery center, put the CD in your drive and boot from it. This is usually done by pressing F8 at startup, or changing the boot drive order in the BIOS.
It you want to crate a system restore point in Vista/Windows 7 , you have navigate to Start> right-click Computer> choose Properties> click System Protection> select Create, type a name, and click Create a restore point.Other method is to open the Control Panel, open the System Protection box and then open the System Restore utility (rstrui.exe) to create a restore point.Even though you have a SystemPropertiesProtection.exe shortcut , still you have to launch the applet and then take at least three more steps to create a restore point.

Here is a small tool from windows club named “Quick Restore Maker” , which allows you to create restore point in a single click .You can name your Restore Point to a custom name.
Download Quick Restore Maker | OS: Windows 7, Vista | 374KB
Have you ever wished for a magic wand that could fix annoying Windows problems? Like, say, a missing Recycle Bin icon, or an excess of pesky Runtime Error messages in Internet Explorer?
Here is a magic wand called FixWin. The solutions to repair and fix 50 common Windows annoyances, issues & problems have been categorized under 5 tabs, viz : Windows Explorer, Internet & Connectivity, Windows Media, System Tools & Misc Additional Fixes. Each problem is presented with a brief but thorough description.This ingenious free tool requires just over 500KB of space, runs without installation, and quickly fixes 50 different Windows glitches—many of which would normally require a scary trip to the Registry. .

For example: “CD drive or DVD drive is missing or is not recognized by Windows or other programs.” . To correct a problem, just click the corresponding Fix button. It’s that simple. And before you get started, FixWin can scan your machine for corrupted system files—and fix them. It also lets you create a System Restore point before making any changes, a smart precaution. FixWin won’t solve all of your Windows issues; but if it can correct just one, it’s well worth the download.
It is suggested that you run the System File Checker Utility first. The button provided on the Welcome page, will ‘run sfc /scannow‘ and will check for and replace any corrupted Windows system files

Before you making any changes to your system , you should create a System Restore Point.After that, you can apply at most one fix at a time and restart your computer.FixWin is freeware and can be freely used for any personal non-commercial purposes only.
Download : FixWin Utility v 1.1 | SysReq :Windows 7 & Vista, 32-bit and 64-bit
Whenever you browse folders containing video or media files in Vista, may get the error COM Surrogate has stopped working . This occurs mainly because of codecs and other COM components installed by various software that aren’t compatible with Vista.
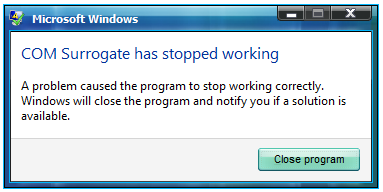
If you use a codec pack, uninstall it and check if the problem is fixed. Try installing individual codec from here on.If you are using Nero or DivX , then upgrade to their latest versions .Also try to disable Thumbnail previews.
One more possible solution is turning off DEP for dllhost,for that do the following
- Right click on Computer, and choose Properties
- Now click on Advanced System Settings, and then under Advanced, click Settings> Click the “Data Execution Protection” tab, and then click “Turn on DEP for all programs
- Click on the Add button, and then browse to C:\Windows\System32\dllhost.exe ,Click Open, and then OK.
Many occasions you may have issues in your PC like unable to recognize the CD/ DVD drive,Recycle bin suddenly disappeared from the desktop and Task Manager & Registry Editor disabled issues .FixWin is a freeware portable application for Windows 7 & Vista to repair and fix such Windows annoyances & issues.It is suitable for 32/64 bit versions of Vista & Win7.

The solutions to repair and fix 50 common Windows annoyances, issues & problems have been categorized under 5 tabs, viz : Windows Explorer, Internet & Connectivity, Windows Media, System Tools & Misc Additional Fixes.

If you have multiple users working on your computer ,using different accounts ,then your PC is sure to be at risk.There are wide range of applications available in net, which can be downloaded and installed .To overcome this problem, you can use the parental control feature in Windows Vista.This can block the installation and access of such applications on different user accounts.
To use this utility do the following.
- Start>Control Panel.Click the ‘Setup Parental Controls for any User “link
- Select a user account on the resulting screen
- Click the ‘On,enforce current settings’ radio button.
- Click the ‘Allow and block specific programs ‘ link
- Select the ‘This account can only use the programs I allow’ radio button .A list of applications will now be displayed.
- Select the applications that need to blocked and click “OK”
- If the program is not mentioned in the list,click “Browse’” and select the required program.
- Once the program has appeared in the list ,select it and click “OK”

You may not aware the built in file encryption utility available with Windows Vista. If you want to use this utility frequently, you can add this option to the contextual menu (the menu that opens on right-clicking a file). This would make it quite easy to encrypt or decrypt your files ,rather than using the file properties dialog box.

To add the encrypt option to your context menu
- Click ‘Start’ and type ‘regedit’
- Navigate to ‘HKEY_CURRENT_USER\Software\Microsoft\Windows\CurrentVersion\Explorer\Advanced’.
- Right-click on the right pane and select ‘New | DWORD 32 bit Value’.
- Name the new key as ‘EncryptionContextMenu’.
- After the creation of key, change the ‘Value data’ field by double-click it and enter the integer ‘1’
- Close the registry editor.
Now whenever you right click a file,there you can see ‘Encrypt’ option in the contextual menu.
Windows Vista Ultimate has an amazing graphical interface like you’ve never seen before. An arrow appears on every shortcut that is placed on the desktop or anywhere on the computer.This can be annoying and you may want to remove them. All you need to do
is edit the registry. Follow the steps listed below to do so:
- Click ‘Start’ and type ‘regedit’
- Expand on folder named the‘HKEY_CLASSES_ROOT’.
- Click the ‘Inkfile’ folder.
- Type ‘AriochIsShortcut’ instead of ‘IsShortcut’
- Once done close regedit and reboot.
- The arrows no longer appear on the shortcut icons.
- To reverse the process, replace ‘IsShortcut’ with ‘AriochIsShortcut’ and reboot the system.


SYSTEM restore is a prominent utility in Windows that can recover files and settings in case of a system crash. It is a must to turn on this feature, but at the same time, it uses a lot of disk space as well. You can limit the amount of disk space system restore uses by executing some commands in the command prompt.
To do so:

shadowstorage" and press the [Enter] key. You will now be able to view the amount of disk space system restore has occupied.

vssadmin Resize ShadowStorage /For=C: /On=C: /Maxsize=512MB
and press the [Enter] key. Here C: is the drive name whereas 512MB is the storage size.Change the size to whatever you want/need. Obviously for any other disks you would need to change C: to that drives letter.
In Windows Vista, the Run entry on the Start menu is not readily available. If you are habituated to using Run on the Start menu, as it was in the previous Windows versions, here is what you need to do to activate it :
- Right click ‘Start | Properties’.
- In ‘Start’ menu, click ‘Customize’.
- Scroll down, locate the ‘Run command’ check box.
- Select and click on the ‘OK’ button to save the changes.

Windows allows you to create several user accounts. Each account may tend to have a particular password associated to it as well. In case if you forget your password later, you can recover it by using a password reset disk. Note that the password reset disk can only be used for local user accounts. To create a password reset disk follow the steps below:
- Insert a removable storage device,for example a USB drive.
- Click ‘Start|Control Panel’.
- Double-click the ‘User Accounts’ icon.
- Click the ‘Create a password reset disk’ link residing on the left pane.
- Click ‘Next’ and select the removable device.
- In the next screen, enter the current user account password in the text box and click ‘Next’.
- Once done click ‘Finish’

To reset your password using the password reset disk, follow the steps below:
- Plug in the USB drive.
- When the login screen appears,simply place the cursor on the password field and press ‘Enter’.
- You will now be able to view the ‘Reset password’ link.
- Click the ‘Reset Password’ link.
- Click ‘Next’.
- Enter your new password, retype it and enter a hint for your password in the respective fields.
- Once done click ‘Next’. You will now be able to login to your system using the new password.
In Vista when the user places the mouse pointer over a particular icon on the desktop, a tool tip pops up. This tool tip displays information about the icon.At a particular time, you might already know what each icon on your screen represents and hence the information might be unnecessary.
If you feel you no longer require tool tips, you can use this simple registry tweak to disable it. To do so:


To Microsoft, "downgrade" means the licensing rights it grants to older operating systems. Downgrade doesn't mean the process for rolling back Windows from Vista to XP.Specifically, these downgrade rights lets owners of some versions of Vista replace it with Windows XP without having to pay for another license.In effect, the license for Vista is transferred to XP.
The process of downgrading to Windows XP from Windows Vista does take some work.

To downgrade, use the following as a guide:
- Do a full backup of your current, Vista system. If something happens, you can always revert to the backup. You have to either back up your data files manually or use a third-party backup tool that works in both XP and Vista. One such program is 2BrightSparks 'SyncBack ‘ which is available in free ,Please read further Free Backup Software Roundup from SparksSpace.Don't bother backing up your applications; you'll need to reinstall them later.
- Boot your computer off the Windows XP disc. Just pop the CD into the CD-ROM and reboot. Configure your BIOS to boot your computer from a CD, if necessary.
- When the computer asks to press the space bar to boot from the CD, do so.
- When Windows XP Setup starts up, press “R” to enter the recovery.
- If it asks you to choose a Windows installation, press a number and hit Enter.
- In some cases, you may be asked for the Administrator password at this point. If you don't know it, you'll have to boot back into Windows Vista, open the Start menu, type lusrmgr.msc, and press Enter. Open the C:\Users folder, double-click on the Administrator account, and turn off the Account is disabled option. Open the Start menu again, type Control userpasswords2 into the Search box, and press Enter. Next, click the Reset Password button, choose a new password, and start over.
- At the command prompt, we’re going to use the “fixboot” command. We’ll use the following commands in sequence to prep for XP:
fixboot
fixmbr
cd \
ren windows winvista
exit - When done, reboot the machine again using your Windows XP CD. This time, you can proceed normally with a normal XP setup
When setup is finished, you'll have to move everything manually. This includes your documents, the contents of your desktop, and any other personal data that you'll need from Vista's now-defunct C:\Users folder into XP's C:\Documents and Settings folder.You need to re-install your applications .
NEC Computers has introduced NEC Flexload, a software solution ,that allows to downgrade rapidly and easily from Microsoft Windows Vista Business (the only edition that NEC supports the downgrade for) to Microsoft Windows XP Professional.


When USB Drive plugged into your computer causes the sound alert to go off but does not get recognized by Microsoft Vista.However, if you reboot your machine the device gets recognized.But it is painstaking to reboot your machine every time.This may due to corrupted system files .

Click the “Start” menu and type “Device Manager” in the search field to open up the Device
Manager. Navigate to the portion of the dialog box that has all your USB controllers enlisted. Right-click on all of them and delete them. Reboot Windows Vista. When Vista reboots it will detect the missing USB controllers and will add the devices automatically. This will take care of the problem if file corruption is the cause. Another means of troubleshooting a problem of this nature is to enable Write Caching.

Ultimate Windows Tweaker is a Tweak UI Utility for tweaking and optimizing Windows Vista, 32-bit & 64-bit.The utility has a simple easy-to-use user interface, with the tweaks being classified in separate heads based of their functionality. Most tweaks are hidden inside Vista, and what this tweaker does is to try and put the useful one's in one place.
Its only 368 KB EXE file which even doesn’t need any installation. You can directly run it after downloading so you can also carry it on your USB drive.You can also create a system-restore point just by clicking a button in the Ultimate Windows Tweaker window--handy just in case a tweak goes awry. Or click Restore Defaults to set everything back the way it was.

The tweaks are classified under seven categories and can be accessed through a common interface, just like your Windows Vista Control Panel.
1) Personalization,
2) User Accounts & UAC,
3) System & Performance,
4) Security,
5) Internet Explorer (IE7 / IE8)
6) Network Optimization
7) Additional Options
For details, click here.

SysReq:Vista32/64 bit|I E 7 or higher|Freeware|368KB
Deep inside Windows, there’s a secret Administrator account, and it’s different from the normal administrator account you most likely have set up on your PC.On Vista, the difference is more than the name: the Administrator account is not subject to User Account Control. So the Administrator can make any changes to the system and will see no UAC prompts.
For this reason, you may want to unlock the Administrator account, and use it only for those times when you want to make a series of system changes and don’t want to be bothered by UAC. True, you could instead simply disable UAC on your system, but it’s a pain to do this, and you may forget to turn it back on.
Turning on the Administrator account is straightforward.
You can unhide or turn on the Administrator account using the steps below:
- Type cmd in the Search field on the Start menu. Right click the command prompt icon at the top of the Start menu and click Run as administrator.
- Type ‘Net user administrator /active:yes’.

Once you complete these steps, the Administrator account will appear on the Welcome screen. To disable once again hide the account, repeat step 1 described above and type ‘Net user administrator /active:no’.
What is the difference between Vista's sleep and hibernate? Sleep awakens quicker than hibernate. In the event of complete power loss, sleep stores the information in RAM, thus loss of power means loss of unsaved data. Hibernate on the other hand, saves the contents of memory to a file called hiberfil.sys, thus you would not lose unsaved data.

The space it takes up depends on your RAM. If you have 1 GB of RAM, Hibernation uses up to 1 GB of hard drive space.If you don't use the Hibernation feature Windows Vista offers, it's taking up a lot of unnecessary hard drive space.
Enable Hibernation in Vista
To enable hibernation, click on your Start menu, and type powercfg.exe /hibernate on in your search box. Then press Ctrl+Shift+Enter, which will run the command line you typed in as an administrator.


Disable Hibernation in Vista
To disable hibernation, click on your Start menu, and type powercfg.exe /hibernate off in your search box. Then press Ctrl+Shift+Enter, which will run the command line you typed in as an administrator.

This pack contains:
BootSafe v2.0.1000
ClearType PowerToy
CPU-Z v1.46
Expired Cookies Cleaner v1.02
GPU-Z v0.2.6
HD Tune v2.55
HWmonitor v1.10
MemTest v3.7
Microsoft AutoPlay Repair Wizard
Microsoft TimeZone <-- Requires .NET Framework
Microsoft Virtual CD-ROM Control Panel v2.1
MSI CleanUp Utility 4.4
Nero Info Tool v5.2.3.0
New MSConfig
Regedit
Startup v2.8 CPL
Services and Devices v2.7
Windows Task Manager
User Accounts 2 CPL
The whole package is uninstallable via the add/remove panel

Thanks to www.wincert.net
After you install SP1 in Vista and you’re happy that this service pack will work out well, you may want to delete the uninstall directories that are taking up a lot of space on your hard disk.
With Windows Vista has a handy tool which is called VSP1CLN.EXE, short for Vista Service Pack 1 Cleaner. The tool can be found in %SYSTEMROOT%\System32 and when run it makes Windows Vista Service Pack 1 permanent on your computer. In short that means that all files that are backed up during SP1 installation are removed and you will gain some gigabytes of disk space.

Caution :You cannot uninstall sp1 later if you want.


